Sometimes it's fun to know how the jewellery you wear is actually made. I thought I would share how I recycle the scrap silver left when I cut out my designs by making it into sterling silver studs.
For this, you need a charcoal block, which encourages the sterling silver to collect into a molten ball when it is heated.
This scrap of silver is the middle between two cut out squirrels!
When heated with a torch, the silver starts to melt and draws together, you can see the ball shape starting to form.
Suddenly the ball shape is formed.
It takes quite some time for the metal to cool.
Here is the finished pair of earrings available from my etsy shop.
I had a tiny length of cast silver twig left from a previous project and I was wondering what on earth I could do with it. It occurred to me that it might make a good broom handle.
I inherited some embroidery threads that were owned by my great grandmother (she had a seriously impressive array of colours in an old biscuit tin) so I soldered a small jump ring to one end of the twig and created a mulberry coloured silk tassel, tying it with a contrasting amber brown colour.
I've added an earring post so that it can be worn as an earring. It is long enough so that it just brushes your shoulder (please forgive the pun!)
I've placed it next to a doll's house sized broom for comparison.
These photos showcase my new bracelet designs for AW14:
The idea of combining distinctive fabric ribbons with precious charms was in part inspired by the tradition of foundling tokens, which form part of The Foundling Museum Collection in London. Parents that were unable to care for their children and had to place them at the Foundling Hospital would leave swatches of fabric from their clothing or a silver charm or even a coin for the child to remember them by. It's a very moving place to visit and indicates how precious simple items such as a ribbon can be. The sari ribbon used for the bracelets is Fair trade and made in India from silk waste (sari material offcuts), which would otherwise be sent to landfill sites. The ribbons are purchased from women's co-operatives in India allowing the women to work from home and earn their own income from their craft. The bracelet can be worn in different ways making a feature bow worn on the wrist or a double knot tucked underneath the rest of the fabric. I will be making several variations over the next few weeks.
I had some very exciting news last Friday! A range of my jewellery inspired by the Tudor and Jacobean portraits in the National Portrait Gallery, London will be on sale from Monday in their new pop-up shop on the second floor. You can see the build of the shop in progress below:
The paintings on display juxtapose portraits of famous Tudor Kings and Queens alongside some of the objects that they most treasured in life. Examples of such objects include Henry VIII's rosary, a page from Edward VI's diary in which he reports his father's death and Elizabeth I's locket ring, which contains a miniature portrait traditionally thought to depict her mother, Anne Boleyn. Best of all, this display is completely free! Taking note of the highly decorative detailing on the historic costumes depicted in the portraits of Elizabeth I, I designed an entirely new range of jewellery to celebrate the fascinating styles of dress in sixteenth-century Britain.
The Lace Point Earrings above evoke the lace cuffs depicted in The Ditchley Portrait of Elizabeth I.
This Tudor Hand Pendant (above) with the Tudor Hand Earrings (below) were directly inspired by another Portrait of Elizabeth I that features Queen Elizabeth I holding a feather fan.
Finally, this Tudor Ruff Ring encapsulates the stiff, starched decorative ruffs worn by monarchs and courtiers alike giving a modern, wearable twist to a striking, historic design.
The National Portrait Gallery is situated in central London, with Leicester Square and Charing Cross as the tube nearest stations. The address is 2 St Martin's Place, London, WC2H 0HE. I really hope that you like these new designs and also enjoy the display!
Well, I finished my vase! It came out with a blue green interior and a white speckled exterior.
The bunny survived too!
All in all, I don't think it's bad for a first attempt. I'm contemplating a further course in the autumn. It would be nice to see how much I can improve!
This week I attended the second part of my ceramics course.
Happily my vase did not crack in the kiln! It has been fired to 1000°C. This is called biscuit firing and is a two part process, leaving the clay porous and ready to accept the glaze. I tested the process of dipping clay into glaze using my test piece. The green glaze will have a pink hue when it is fired. The white patch will have a natural clay colour with white speckles.
For the inside of my vase, I poured a blue green glaze into the vase and swirled it around inside quickly. It is essential not to let the glaze get too thick.
I then dipped the vase upside down (bunny first) into a white glaze, which was pretty thick. This was just one dip.
I tried sponging on the blue green glaze near the base of the vase for extra detail. It is ready to be fired again. I get to collect it on Monday. Hopefully it will survive the second firing process!!!
After soldering, pieces can often look completely hopeless. Sometimes I think I've completely destroyed something until I've pickled (cleaned in a weak acid) and polished it. Below you can see that Elizabeth looks quite mucky and not particularly regal!
After a lot of elbow grease and polishing with sandpapers of various grades, the design becomes clearer and the brooch starts to looks much more wearable. Although the brooch in the photo below has clearly been polished a lot, it still needs a lot of work. I use 240 grade emery paper to take away any fire stains and then work down to finer grades of paper such as 1000 and sometimes even 2000 to get that high shine. It takes a lot of time but at least you can do this whilst watching a film! In fact, sometimes I find that I associate pieces forever with what I've watched whilst polishing them! Today it was The Simpsons. Perhaps I should have watched something a little more historical?
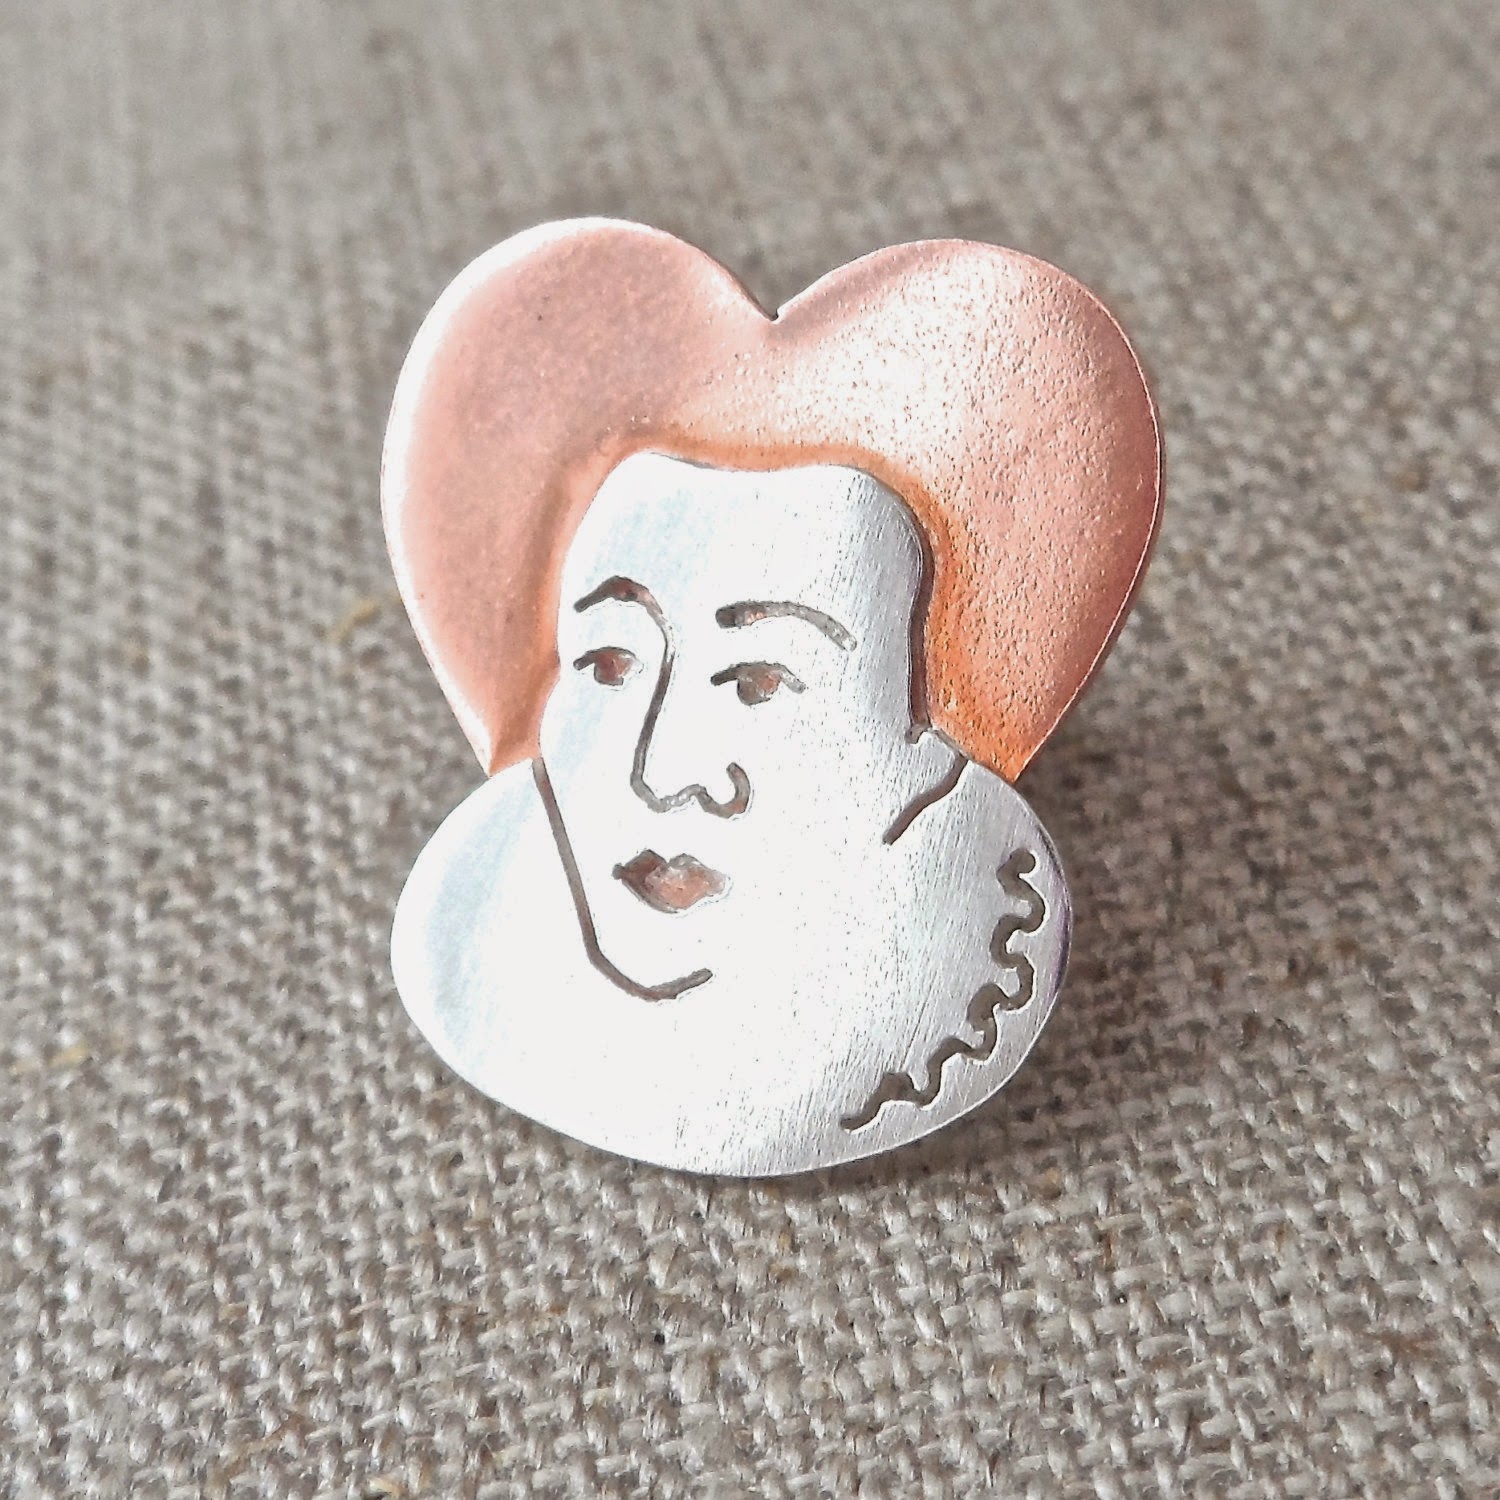
Finally, this is the finished brooch (below). It has been polished to a very high shine. The detailing is clear and I'm pretty pleased with the result! I would like to see if I could make a smaller version to have as earrings and perhaps as cufflinks or a pendant? This is a basic version and I could set gemstones and make more elaborate ruffs as well, which might be fun!
Queen Elizabeth I was very aware of how important her image was to her subjects and to the rest of the world. She cultivated her appearance as the Virgin Queen by applying make up and wearing elaborate wigs and gowns. She famously never married, choosing to retain sole power as Queen of England.
Inspired by surviving portraits of Elizabeth I, I decided to see if I could recreate her image in copper and silver. The portrait below was a particular inspiration. It dates from c. 1588 and commemorates the defeat of the Spanish Armada. It part of the National Portrait Gallery's collection although it is rarely on display.
First, I had to pare down the design to make it easier to pierce from silver sheet. I drew my design onto the sheet and drilled tiny holes where the eyes, eyebrows and mouth were going to be. The next stage was to pass a saw blade through the holes and sketch out the design by cutting into the metal. This is incredibly fiddly and you need an exceptionally steady hand! There is an added sense of fear because if you make a mistake, you cannot rectify it and you have to start again.
Next, I needed to cut out a heart shaped piece of copper for the hair. I wanted it to cover the detail in the face and to strengthen the design so it had to be big enough to fit neatly behind the ruff.
The fear of filling the pierced design with solder is very real and so I've found the best way to achieve good results is to use very tiny pieces of solder positioned very carefully. I then laid the silver Elizabeth onto the copper sheet and moved the flame continuously whilst checking to see if the two metals were fixed together.
After soldering, Elizabeth I looked quite like a zombie! The flux has reacted here to provide a greenish tinge and the copper is demonstrating the beautiful fire patterns that can be achieved through heating copper and then quenching in cold water very quickly.
I've included a photo below of the process of soldering a brooch pin onto the back of Elizabeth. I used silver solder to solder between a silver pin and the copper sheet.
I recently visited the Toulouse-Lautrec Museum in Albi, France. It is a spectacular art gallery, situated in the Palais de la Berbie, a former residence for the medieval Bishops of Albi with exquisite gardens and a definitive collection of Toulouse-Lautrec's work including his posters, very early paintings and even the litho stones, which were used to create his lithographic prints.
Here are some of my holiday snaps, which I hope capture the beauty of Albi.
The image below on the left hand side shows Toulouse-Lautrec's only foray into ceramics and it is a portrait of the cabaret singer and actress Yvette Guilbert. It can be compared with the photograph on the right hand side.
Lautrec has depicted Guilbert's trademark silhouetted gloves and has pared down his use of colour indicating the influence of Japanese ukiyo-e prints on his work. Yvette Guilbert was not entirely enamoured with her likeness. She preferred more flattering portraits but Lautrec captured her character in just a few lines through the tilt of her head as she receives the adulation of the audience and the drama of the stage, allowing the spectator a close-up of this famous star. I have to say, I really admire his work.
Here is a clip of Guilbert singing. I think it really brings the portraits to life.
I loved Toulouse-Lautrec's ceramic portrait and so I decided to do a short course at Morley College in London to see how I fared with basic ceramic techniques. The course is held over two, three hour sessions. After the first session, I have constructed a vase, which is ready to be fired. I took photos as I worked to keep track of each stage in how to make a simple cylindrical vase.
Here are the three types of clay that we were offered. I opted for the one on the left, which apparently has a dark speckled effect when fired. The middle clay had a high proportion of sand in it, giving it a gritty texture and the lightest grey clay is the most refined.
First you knead the clay and then you roll it out. Believe me, it is good for your arm muscles!
I used an old bath mat to make the pattern to be used for the decoration on the vase. It gives a surprisingly intricate effect.
Then I had to trim the clay.
I wrapped it around a cardboard tube, covered in newspaper, which makes it easier to extract once the cylindrical shape is retained by the clay.
Once the clay was trimmed and joined together, I added a base and shaped it to add extra interest.
My final addition was a little sculpted bunny and I then covered the dark clay in white 'slip', which will make the colour glaze stand out better when it is fired for a second time next week.
I was asked to prepare a tester piece of clay, which I hope to use to experiment with different glazes. I should be able to use it as a coaster afterwards!
Here's a close-up of the bunny. I really hope he remains in tact after the first round of firing!
And finally, here is the potter's wheel, which pretty much meant that I had Unchained Melody in my head for the whole session!
Made me think of this scene from Community!
Next week, I will be adding colour glazes. I am looking forward to seeing the finished vase.


