Showing posts with label silver jewellery making. Show all posts

Thursday, 11 September 2014

Jewellery Designs by Sarah Birt Now For Sale in the National Portrait Gallery, London

I had some very exciting news last Friday!

A range of my jewellery inspired by the Tudor and Jacobean portraits in the National Portrait Gallery, London will be on sale from Monday in their new pop-up shop on the second floor.

You can see the build of the shop in progress below:


The shop accompanies an exciting new exhibition entitled The Real Tudors: Kings and Queens Rediscovered, which opens tomorrow (Friday, 12th September).


The paintings on display juxtapose portraits of famous Tudor Kings and Queens alongside some of the objects that they most treasured in life. Examples of such objects include Henry VIII's rosary, a page from Edward VI's diary in which he reports his father's death and Elizabeth I's locket ring, which contains a miniature portrait traditionally thought to depict her mother, Anne Boleyn.

Best of all, this display is completely free!

Taking note of the highly decorative detailing on the historic costumes depicted in the portraits of Elizabeth I, I designed an entirely new range of jewellery to celebrate the fascinating styles of dress in sixteenth-century Britain.


The Lace Point Earrings above evoke the lace cuffs depicted in The Ditchley Portrait of Elizabeth I.


This Tudor Hand Pendant (above) with the Tudor Hand Earrings (below) were directly inspired by another Portrait of Elizabeth I that features Queen Elizabeth I holding a feather fan.


Finally, this Tudor Ruff Ring encapsulates the stiff, starched decorative ruffs worn by monarchs and courtiers alike giving a modern, wearable twist to a striking, historic design.


The National Portrait Gallery is situated in central London, with Leicester Square and Charing Cross as the tube nearest stations. The address is 2 St Martin's Place, London, WC2H 0HE.

I really hope that you like these new designs and also enjoy the display!

Thursday, 17 July 2014

Crafting the Image of Elizabeth I Part One

Queen Elizabeth I was very aware of how important her image was to her subjects and to the rest of the world. She cultivated her appearance as the Virgin Queen by applying make up and wearing elaborate wigs and gowns. She famously never married, choosing to retain sole power as Queen of England.

Inspired by surviving portraits of Elizabeth I, I decided to see if I could recreate her image in copper and silver. The portrait below was a particular inspiration. It dates from c. 1588 and commemorates the defeat of the Spanish Armada. It part of the National Portrait Gallery's collection although it is rarely on display.

© National Portrait Gallery, London


First, I had to pare down the design to make it easier to pierce from silver sheet. I drew my design onto the sheet and drilled tiny holes where the eyes, eyebrows and mouth were going to be. The next stage was to pass a saw blade through the holes and sketch out the design by cutting into the metal. This is incredibly fiddly and you need an exceptionally steady hand! There is an added sense of fear because if you make a mistake, you cannot rectify it and you have to start again. 

Next, I needed to cut out a heart shaped piece of copper for the hair. I wanted it to cover the detail in the face and to strengthen the design so it had to be big enough to fit neatly behind the ruff.

The fear of filling the pierced design with solder is very real and so I've found the best way to achieve good results is to use very tiny pieces of solder positioned very carefully. I then laid the silver Elizabeth onto the copper sheet and moved the flame continuously whilst checking to see if the two metals were fixed together.


After soldering, Elizabeth I looked quite like a zombie! The flux has reacted here to provide a greenish tinge and the copper is demonstrating the beautiful fire patterns that can be achieved through heating copper and then quenching in cold water very quickly.

I've included a photo below of the process of soldering a brooch pin onto the back of Elizabeth. I used silver solder to solder between a silver pin and the copper sheet.


Wednesday, 26 September 2012

Sketching in Silver Sir Walter Raleigh finished pendant

A few photos of the finished pendant:
I quite like the hammered oval frame. I soldered it on using pallion soldering so that everything is secure.

Tuesday, 25 September 2012

Sketching In Silver Series Update: Soldering

This post is an update of my Sketching In Silver: Portraits series, which has been at the top of my to do list for some time. The idea is to pierce a portrait of an historical individual using well known British portraits for inspiration, then solder some silver sheet onto the back to strengthen the pierced design. It did work the first time that I tried it with my portrait of Elizabeth I
However, since then I've had a few expensive disasters that are frustrating and disheartening when the solder ran and obscured the pierced design as you can see from poor Anne Boleyn below
Now, it's a poor workman (or woman) who blames his (or her!) tools but I do think that the technique of pallion soldering that I was using was incorrect for this type of work. Pallion soldering is when you cut up tiny pieces of solder and melt them using a butane torch on a fire brick. Anyway, after some serious contemplation, I alighted on the idea of using silver solder paste. My reasoning was that the solder is powdered and combined with flux in a syringe so it should melt quicker and stop the silver from getting too hot and melting or the solder from running too freely. A bit more research and I decided to use hard solder paste (there are several types of solder: hard, medium, easy and extra easy where hard is the most commonly used.) Last night I had a go at making a Walter Raleigh pendant and apart from the extremely noxious fumes that the solder paste produced (seriously this should most definitely be used in a well ventilated area and if you possibly can, outside!) by jove I think I've got it!
The design seems securely soldered onto the sheet at the back and as you can see, the solder hasn't run and engulfed the design as before. The original portrait miniature that this image is based on is by Nicholas Hilliard and it is part of the National Portrait Gallery's collection. It is unfortunately not currently on display. Now I just have to decide what design to use as a frame and then solder on some links to attach the beads that I want to use. Of course it could still go very wrong when I solder the frame on but fingers crossed all will turn out well!

Monday, 10 September 2012

How to Make a Fire Demon: Part Two

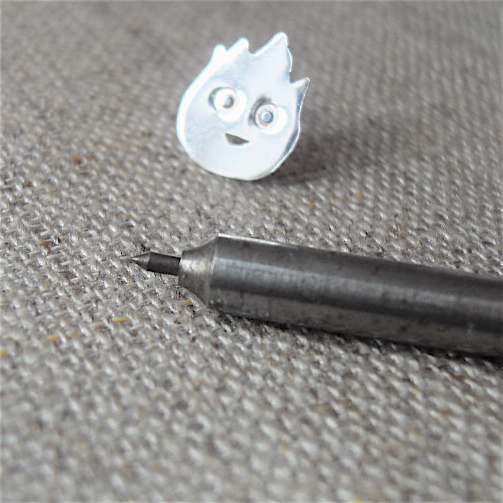
I decided to make my little silver Calcifer into an earring so I soldered an earring post onto the back of the silver shape.
After filing, sanding and polishing him using a barrel polisher, he was very shiny indeed and I used Liver of Sulphur to oxidize the tiny dots in his eyes. It is a liquid which bled a little around the edges that I wanted to keep silver so I then used a very sharp scribe to scratch at the surface around the black pupil of the eye to keep the oxidized part to that small raised area.
Another quick polish and he was ready to wear!

Sunday, 9 September 2012

How to Make a Fire Demon Earring: Part One

Using my new jewellery making set, I decided to experiment and see what effects I could get from stamping the various tools onto 0.5 mm silver. You pass the steel rod through the opening at the top of the metal stamper. Pre-heat the metal to make it more malleable and cool it by plunging it in cold water. Then, position the stamp over the silver sheet and give it a whack with a hammer (I used a 16oz hammer, which is pretty heavy with a long handle so that it would make a decent impression!)
The effect of having a tiny raised dot and compressed outer ring looked like an eye to me and as I have been watching my Studio Ghibli dvds again recently, I thought it was a perfect excuse to make a little Calcifer fire demon from Howl's Moving Castle!
I cut around the eyes free hand to make the flame ball shape and drilled a small hole for the mouth, passing a saw blade through to make the smile shape.
To be continued...

Friday, 7 September 2012

Vintage Jewellery Making Set

The antiques market in the Jubilee Hall in Covent Garden is one of my favourite places to go on a Monday morning. It's got a fantastic array of jewellery, porcelain and the odd random knick knack all at very reasonable prices considering its central London location. I often find that there are those moments when you notice an item on a stall and are drawn towards it like a moth to the flame. The Monday just gone was one of those moments! A humble red wooden box holds a wonderful array of watchmakers and jewellers tools. Stone setting implements, gravers and punches. Some of the tools are a mystery to me but I knew enough about them to know that I had to have them!
The label on the front of the box reads Robert Pringle and Co. The company was formed in 1835. They ceased trading in 1965 so this is at least 47 years old!
Judging by the wear on the box, it has been well used although some of the tools are a little bit rusty. I wonder who used them in the past. Perhaps it was by an apprentice although the tools are so fine so they must have been used by someone with a steady hand and a lot of skill. I have used similar tools before so I can't wait to get to work on some silver with these!

Tuesday, 7 February 2012

Upcoming Hobbit, Flying Dragon

With The Hobbit Parts 1 & 2 coming up very soon I am trying to work on some new designs inspired by Middle Earth. This little dragon has moving wings and is the first of a few moving and slightly more complicated designs that I want to try. Strictly speaking though, he's not actually wearable at the moment! I'm still working on that part!


Monday, 23 January 2012

A little bit in love with Sherlock!

A very belated Happy New Year everyone!

I haven't blogged in a long time because I've been writing my first essay for my masters in the History of Britain. Very daunting and I have been mildly guilty of what I like to call 'productive procrastination' during the period when I've desperately needed a break from studying the actions of women in the English civil war! I've been trying to get back into portraiture. I used to draw a lot (usually people from films and television because 'real' people sometimes get upset with how you depict them!) so given the fact that Sherlock became the highlight of my week recently, I thought I'd try painting Benedict Cumberbatch.

Here is the result of my 'productive procrastination'...


It kind of looks like him and I don't think it's awful for a first attempt at using watercolours. I'm definitely going to need more practice though!

I've decided that a new year needs new designs and now that I've finally submitted my essay, I'm trying to work out what these new designs might entail. I think that dark fairytales will feature and I'm working on more layered pieces that will include lockets and secret compartments and moveable components. This may be a bit ambitious given my limited resources but I'd like to make more intricate pieces. I will also be taking inspiration from Tudor and Stuart portraiture, particularly miniatures so I will experiment and post some of my attempts in due course. Think Elizabeth I and Anne of Denmark!

Anyway, getting back to what's really important... how do you think Sherlock Holmes survived his fall?!!!

I'm sure there's an elementary explanation.

Sunday, 16 October 2011

New Autumn / Winter Designs 2011

What with moving, starting a masters in the History of Britain (that I am supposed to be doing the reading for at this very moment!) and working full time, I am finding it quite difficult to make anything new in terms of jewellery but somehow I have managed to list a few new things in my shop this weekend and I thought I would put some photos of the new designs up for your perusal.
The setting for this citrine is the first claw type setting that I have ever made and although it took me about two hours, I am rather proud that it not only fits the stone but keeps it in place securely!
This is my extremely geeky homage to Charlotte Bronte's novel Jane Eyre. The recent film version, which should be still on at the cinemas is very good if you fancy a night out!
This buckle dating from 1901 is an exquisite example of pierced and engraved silver and looks lovely with the ethereal silvery grey pearls and fancy pearl set clasp.
My homage to Autumn and red squirrels, which I went to see in the wild the other day on Brownsea Island, has watermelon tourmaline beads paired with a gorgeous pink tourmaline cabochon set in another handmade setting with acorn detail on the reverse.
And finally, there are four of these adorable little mother of pearl buttons with carved deer and fir tree design. They are available in pink, blue, yellow and purple.

I have also booked two crafts fairs, one on the 12th November and the other on the 10th December and will give you all the details as soon as I receive the flyers.

Phew! Now back to Eric Hobsbawm and the English Revolution. I'm trying not to be biased (like every good historian) but I already know that I would have been a Royalist!

This is one of my favourite portraits in the National Portrait Gallery because it has charming and slightly ghoulish transparent overlays that chart the life and death of Charles I and it is particularly impressive that they have survived.

Wednesday, 24 August 2011

The second batch of Paris rings

After an extremely disappointing day of house hunting I have devoted some time to trying to finish the second part of the order from the Paris boutique.
Here are photos of the almost finished specimens...

Friday, 19 August 2011

Woodland bling's the thing!

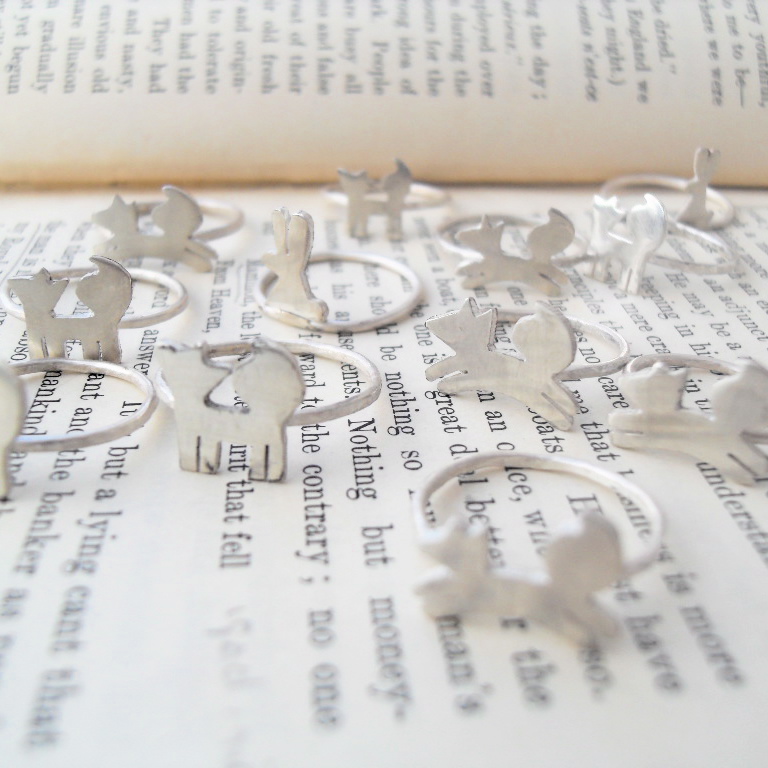
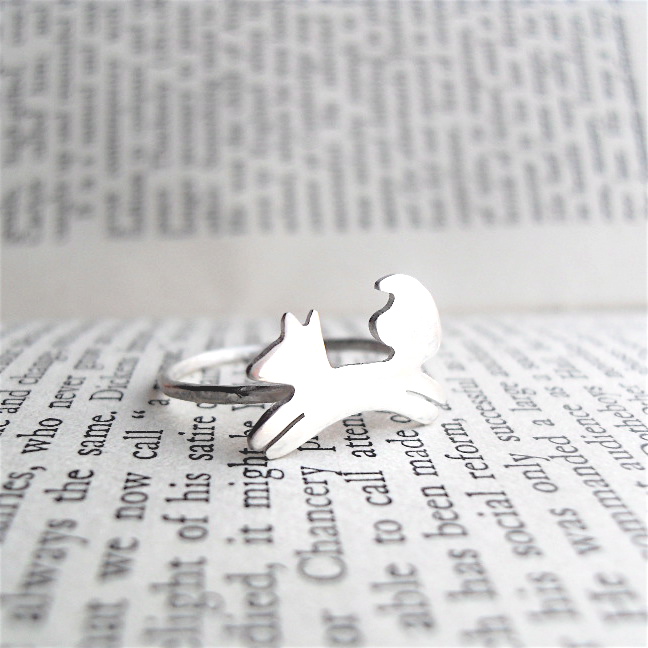
At the moment I'm wondering whether you can ever have enough little fox and bunny rings?! I'm growing quite attached to these little critters as they are all slightly different. I've finished making about twenty rings so another 12 to go. Hopefully I will be able to send some off this weekend to Paris!

Friday, 12 August 2011

26 Rings Soldered!

Well, I've had a strange day of watching the BBC's adaptation of George Eliot's Middlemarch whilst simultaneously hammering a seemingly endless number of ring bands into a circular shape and then soldering them onto the corresponding silver animal!

One little bunny unfortunately bit the dust and got melted but the rest have worked out ok. I've soldered 26 out of 32 rings but I've got to stop now because I've been getting confused about which animal should go on which ring band!

Getting there though... there is almost an end in sight! Just got to file and sand every single ring when I've finished soldering...

Wednesday, 3 August 2011

Paris Boutique

Hello All,

Sorry I haven't blogged for a few weeks but I've been trying to keep up with a whole host of very time consuming activities. I'm moving house, applying for a postgrad course, working full time and running a business. Not a recipe for ever having any spare time! :-)

I do have some good news to impart though. Jewellery Designs by Sarah Birt is now going to be stocked in a boutique in Paris! I'm so excited about this! The shop is called Bird on the Wire and you can visit the lovely website here.

They have ordered 12 stargazing fox rings, 12 dancing fox rings and 8 bunny rings. Needless to say I am working very hard to make them all!

Here is a photo of my progress so far...
I have soldered all of the ring bands and have cut out seven little stargazing foxes so far. I hope to get some more done today. Then I will need to file and polish them, which always takes longer than expected but hopefully they will be in the shop by October.

I will keep you updated with my progress over the next few weeks. It's going to be hard work but very worth it!